Saturday, June 15, 2019

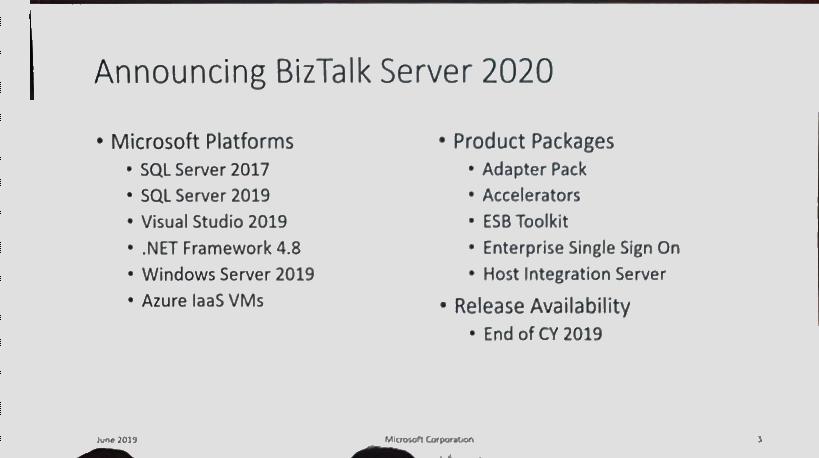
BizTalk Server 2020 is here :)


After much anticipation and delighted to know that the BizTalk Server 2020 is on the card for microsoft

http://www.biztalkgurus.com/blogs/msft-biztalk-community/biztalk-server-2020-is-coming-at-the-end-of-cy-2019/

It was announced in the Integrate 2019. This will add great capabilities to the Hybrid Integration story for Microsoft.


https://blog.sandro-pereira.com/2019/06/12/biztalk-server-2020-is-coming-at-the-end-of-cy-2019/


Whether logic apps will be available for in-premises

Saturday, June 08, 2019

Setting environment variable in the .Net Core API in Kubernetes


Setting up and Managing environment variables is a crtical task as part of the deployment of your solution in different environment. One of the ways to apply
environment variables while deploying the PODS in the Kubernetes cluster.

.Net Core 2.0 Provides the following option in setting up the environment variables.
launchSettings.json  - Manages environment variable, which used to launch the application
appsettings.json  - Manages variable for the apps like database connection string, variables setting for APP etc

Also we can inject multiple JSON file for app settings.

This is one of the technique to deploy pods with the environment variables. Include the variable and right value before deploying the image using k8s yml file


Monday, December 02, 2013

Problem with WCF-Custom adapter (WS HTTP Binding with reliable messaaging) - Error event logged, even though transaction completed Sucessfully

When BizTalk Server sends request to WCF Service, The system is able to service the request and complete the transaction successfully.  But after the successful completion of the transaction, the following two events are logged in the BizTalk server. The orchestration, which initiates the service request also getting completed successfully.
Log Name:      Application
Source:        BizTalk Server
Date:          18/11/2013 10:43:11 p.m.
Event ID:      5796
Task Category: BizTalk Server
Level:         Error
Keywords:      Classic
User:          N/A
Computer:     
Description:
The transport proxy method MoveToNextTransport() failed for adapter WCF-Custom: Reason: "Messaging engine has no record of delivering the message to the adapter. This could happen if MoveToNextTransport() is called multiple times for the same message by the adapter or if it is called for a message which was never delivered to the adapter by the messaging engine". Contact the adapter vendor.
Log Name:      Application
Source:        BizTalk Server
Date:          18/11/2013 10:43:11 p.m.
Event ID:      5677
Task Category: BizTalk Server
Level:         Error
Keywords:      Classic
User:          N/A
Computer:     
Description:
The Messaging Engine encountered an error while suspending one or more messages.

The details of the service is given below

Service
-          WS-HTTP Binding
-          Reliable messaging enabled
-          Security :
o   Mode : Message
o   ClientCredentialType : Windows
Client
-          BizTalk WCF Custom adapter  with WS-http binding (BizTalk Server 2010)
-          Static two way port
-          Reliable messaging enabled
-          Security :
o   Mode : Message
o   ClientCredentialType : Windows

Every thing works fine as expected for the interface. ie the transaction is success. After a min of the transaction completion. I am getting the errors.
01. I have not checked Propagate Fault message (as a solution provided in another blog)
02. Its a static Port
03. I am using reliable messaging
The below error events are logged in the event viewer

Looks like the issue is BizTalk is not able to handle the reliable message properly. Its failing when it tries to close the connection after successful transaction.

I am working with Microsoft to get this sort it out currently, I will update once I have more details on this issue.

Thursday, December 13, 2012

BizTalk Server 12th Birthday


Happy Birthday BizTalk Server 12/12/2012 Born on 12/12/2000
A Many more returns of the day for BizTalk Server ... The first version of the product "Microsoft BizTalk Server 2000" was released back in 12/12/2000

BizTalk Summit 2012 is happening in Redmond, Seattle on 10th and 11th of December 2012 .The main objective of the event is to show the roadmap, future direction of BizTalk and to highlight what’s coming in the upcoming BizTalk Server 2013 version and improvement that’s happening on the integration side in Windows Azure.

Some good news about BizTalk Server. In Scott Guthrie, Vice President, Microsoft developer division key note, he has mentioned that the "Microsoft is heavily investing on BizTalk Server".
But I did not get, What is the roadmap for BizTalk server beyond 2013

More about the summit please read here . 

But where Microsoft is investing ???

Wednesday, December 05, 2012

Business Intelligence - Part 1 - Date/Time Dimensions, Table Design for periodic aggregate reports

Introduction


Often we end in scratching our head for writing SQLs for a report, where we finally end up writing few SQL in the loop and make a final report. There are age old techniques to achieve that, while we miss the view in doing that.

Sometimes single query could solve our issue in much faster approach than the queries in loop.

Going in search of knowledge of such options I have ended up in learning Data Warehouse and Business Intelligence. The primary approach would be to take baby steps one by one and to reach the destination.

Problem:

What we have:

It is a small store with sales data, what we have is just products, sales invoice and invoice items.


What we need:

Simple intelligence reports

  1. Sales per day of the provided month
  2. Sales per day of the provided week
  3. Sales per quarter of the provided year
  4. Sales per year overall
  5. and more if possible

Solution

Introduce date and time dimensions


Add new dimension tables as above, these tables help to give more business related information like weekday name like Monday, Tuesday, or the quarter of the year Q1, Q2,Q3,Q4 etc.,

The date dimension should have the date_key as long value like 20091125 to map a 2009, November 25th.
Having this as a numeric field like long will help the joins to be faster. Each other table columns are expected to repeat the values in detail. year as 2009, month as 11, day_of_month as 25 etc. We could add more columns as much as needed to provide the business reports.

The time would have a fixed 24 x 60 entries of 1440. If in case we need a second based match, we may need to have 86400 records, but better to avoid second level reporting as it is not required for the store management.

Introduce dimension mapping columns

Add the dimension mapping columns in the invoice for the invoice date, which will have invoice_date_key and invoice_date_time_key.

Both would have numeric values like 20091125 and 1429.

Write the queries.

1. Sales per day of the provided month

SELECT dd.day_of_month, SUM(invoice.total_amount) FROM invoice
RIGHT OUTER JOIN dim_date  dd ON dd.date_key = invoice.invoice_date_key
AND invoice.invoice_date BETWEEN 'x' AND 'y'
GROUP BY dd.day_of_month
ORDER BY dd.day_of_month

The above would result something like
1 $100
2 $90
3 $2000
4 $1200
5 $600
etc...

1.1 Sales per day of the per month, for provided year


SELECT dd.month_short_name_en, dd.day_of_month, SUM(invoice.total_amount) FROM invoice
RIGHT OUTER JOIN dim_date  dd ON dd.date_key = invoice.invoice_date_key
AND invoice.invoice_date BETWEEN 'x' AND 'y'
GROUP BY dd.month, dd.day_of_month
ORDER BY dd.month, dd.day_of_month


The above would result something like
Jan 1 $100
Jan 2 $90
Jan 3 $2000
...

Feb 1 $110
Feb 2 $20
Feb 3 $1000

Feb 4 $1200
Feb 5 $600
etc...


The join with the dimension can be varied and more grouping and aggregation can be done to form variety of reports in a single query, which could impress the business.


    Tuesday, December 04, 2012

    J2EE Web Application Deployment setup for Development in JBoss AS 7.1

    Deploying a J2EE web application is very easy in JBoss AS 7.1.x server. Make your J2EE application as a war file, login to JBoss admin console, in Manage Deployments area, you can upload the war file and Enable it to make it deployed. But, is it possible to keep the deployment process like this while you are developing an application? Certainly not. This process will consume lot of time to see the development changes working.

    This post will help you to setup the deployment process for development in JBoss.

    Instead of deploying the application as a war file, we are going to deploy it as a exploded war directory under <JBoss Home>/standalone/deployments/. This is called exploded deployment, which helps development in greater extent. Follow the steps to get the exploded deployment working,


    • Create a directory with .war suffixed with your application name under   <JBoss Home>/standalone/deployments/ directory.
    • In <JBoss Home>/standalone/configuration/standalone.xml, add auto-deploy-exploded="true"  attribute to deployment-scanner node under deployment-scanner subsystem. 
    • You can also set scan-interval (scan-interval="5000") attribute and set your an interval to the  deployment-scanner node. For example,
                <deployment-scanner path="deployments" relative-to="jboss.server.base.dir" scan-interval="5000" auto-deploy-exploded="true" deployment-timeout="1200"/>
    • If the above are done, you have to get the J2EE application contents placed in the deployment directory we have created. It is better to link the output folders to the deployment directory, if you are using an Eclipse based IDE. JBoss will redeploy the application when it finds a change in the code. So all you have to do while development is, do a build when you want to see the code changes working.


    When I was running the application successfully, I noticed that all the cookies from the application is suffixed with . undefined . For example, 

    Ur1bLe3UDdWJ9xm0ZDbMfZvJ.undefined

    this is a bug in JBoss 7.1x and as a workaround, you have to set instance-id attribute in jboss:domain:web subsystem in standalone.xml. For example,

    <subsystem xmlns="urn:jboss:domain:web:1.1" default-virtual-server="default-host" native="false" instance-id="myDomain">

    This is not a serious issue, but include the above configuration changes as a good practice. 


    Monday, December 03, 2012

    Dojo + AngluarJS a powerful combination

    For years impressed with Dojo for its complete suite. It was quite sometimg, I started to fall in love with AngularJS for its plain way of working in DOM.

    Dojo's modular code now supports the AMD, which is quite compliant with all the other libraries.

    Normal Dojo page

    <!doctype html>
    <html>

    <head>
        <script src="path/to/dojo/1.7.x/dojo.js" type="text/javascript" data-dojo-config="parseOnLoad: true"></script>
        <script type="text/javascript">
            require(['dijit/form/DateTextBox']);
        </script>
    </head>
    <body>
    <input id="dateBox" data-dojo-widget="dijit/form/DateTextBox"  />
    </body>
    </html>


    AngularJS page


    <!doctype html>
    <html data-ng-app>
    <head>
        <script src="http://code.angularjs.org/1.0.1/angular-1.0.1.js"></script>
        <script type="text/javascript">
            function TestController($scope) {
        $scope.date = new Date();
        $scope.alert = function(msg) {
        $scope.text = msg;
        };
        };
        </script>
    </head>
    <body data-ng-controller="TestController">
          <input id="dateBox" data-ng-model="date2" data-ng-change="alert(date2)" />
          <span id="text">{{text}}</span>
    </body>
    </html>


    Dojo + AngularJS page

    <!doctype html>
    <html data-ng-app="angular-dojo-test">
    <head>
    <link rel="stylesheet" type="text/css" href="http://ajax.googleapis.com/ajax/libs/dojo/1.7.2/dijit/themes/claro/claro.css" />
    <script src="http://ajax.googleapis.com/ajax/libs/dojo/1.7.2/dojo/dojo.js" type="text/javascript"></script>
              <script src="http://code.angularjs.org/1.0.1/angular-1.0.1.js" type="text/javascript"></script>
            <script src="angular-dojo.js" type="text/javascript"></script>
        <script>
       
        function TestController($scope) {
         $scope.date = new Date();
        $scope.alert = function(msg) {
        $scope.date = msg;
        };
        };

        var module = angular.module("angular-dojo-test", ['angular-dojo']);

        </script>
    </head>
        <body class="claro" data-ng-controller="TestController">
        <div>
        <input id="dateBox" data-dojo-widget="dijit/form/DateTextBox" data-ng-model="date" data-ng-change="alert(date)" />
       </div>
       <h1>Date 1: {{date}} </h1>
        </body>
    </html>


    The angular-dojo.js can be found in the github.
    An amazing way to do the JS works

    Saturday, December 01, 2012

    Building JS Graphs, jQuery, Dojo Charts, Google Charts, ExtJS Charts

    Recently in few of the projects there were needs to use Graphs.

    Plenty of them were in race. jQuery jqplot, dojo, extjs.

    jqPlot


    Dojo Charts

    ExtJS


    While the above were good to start with am quite impressed with Google Graphs, Their documentations and simple access to the APIs without complexities.
    Google Charts 

    Google charts is simple easy and quite good with its look and feel and behaviour for applications where we don't need much modifications but just to show data.


    PHP 5.3+ Doctrine2 Schema update script

    I have been working more than 3 years with doctrine, and now started to play with Doctrine 2 for few of my new projects, Its almost a year with Doctrine 2. Here is what it helps the team in development.

    The command line tool to update tables and dump SQLs for upgrades.


    The app uses ZendFramework and Doctrine, here is the small snippet that helps me to run the doctrine commands

    $env = getenv('APPLICATION_ENV') ? getenv('APPLICATION_ENV') : 'development';
    define('APPLICATION_ENV', $env);
     
    define('APPLICATION_PATH', realpath(dirname(__FILE__) . '/../application'));
    
    set_include_path(implode(PATH_SEPARATOR, array(
        realpath(APPLICATION_PATH . '/../library'),
        realpath(APPLICATION_PATH . '/models/entity'),
        realpath(APPLICATION_PATH . '/util'),
        realpath(APPLICATION_PATH . '/models'),  
        get_include_path(),
    )));
    
    // Doctrine and Symfony Classes
    require_once 'Doctrine/Common/ClassLoader.php';
    require_once 'BaseEntity.php';
    
    $classLoader = new \Doctrine\Common\ClassLoader('Doctrine');
    $classLoader->register();
    $classLoader = new \Doctrine\Common\ClassLoader('Symfony', 'Doctrine');
    $classLoader->register();
    $classLoader = new \Doctrine\Common\ClassLoader('Entities', APPLICATION_PATH . '/models');
    $classLoader->setNamespaceSeparator('_');
    $classLoader->register();
    
    // Zend Components
    require_once 'Zend/Application.php';
     
    // Create application
    $application = new Zend_Application(
        APPLICATION_ENV,
        APPLICATION_PATH . '/configs/application.ini'
    );
    
    // bootstrap doctrine
    $application->getBootstrap()->bootstrap('doctrine');
    $em = $application->getBootstrap()->getResource('doctrine');
    
    // generate the Doctrine HelperSet
    $helperSet = new \Symfony\Component\Console\Helper\HelperSet(array(
        'db' => new \Doctrine\DBAL\Tools\Console\Helper\ConnectionHelper($em->getConnection()),
        'em' => new \Doctrine\ORM\Tools\Console\Helper\EntityManagerHelper($em)
    ));
    
    \Doctrine\ORM\Tools\Console\ConsoleRunner::run($helperSet);
    
    The above PHP snippet was saved as doctrine.php And the following commands can be used against the database migrations

    > php doctrine.php orm:schema-tool:create
    > php doctrine.php orm:schema-tool:update --force
    > php doctrine.php orm:schema-tool:update --dump-sql
    Trying the following command gives list of other options to perform
    >php doctrine.php

    Friday, November 30, 2012

    Jquery - How to know any changes happen in the form

    At first, I thought initially its a easier task, to find a change happen in a aspx form (Page) . And to my worst there are atleast 30 text box 6 combo and few more ajax grids. I cannot write page full of javascript, whether any changes happened in any of the control.

    It took me another 2 days to get find the solution with Jquery. and amazing just 2 lines of code :)

            //To check if there is any changes happening in the form/page
            $(document).ready(function () {
                $('.bodyContainer').change(function () {
                    // DO YOUR CODE HERE
                        }
                    }

    Few lines above has solved my problem.


    Quick Setup of JBoss 7.1 with MySql Datasource

    This post will help you to setup JBoss AS 7.1.x with MySql Datasource. 

    As a precondition, we should have the following ready in our development environment
    JDK 1.7
    MySql
    JBoss AS 7.x 


    Run JBoss Server
    Once downloaded and extracted JBoss AS 7.1, you can run the server by executing the <JBoss home>/bin/standalone batch (Windows) or shell(Linux) file, based on your OS. Make sure the server got started without any errors by checking the logs. You can also verify by visiting the url http://localhost:8080 in your browser, which shows you the JBoss home page.


    Create User
    We have to create users to access JBoss administration console. To add new users run add-<JBoss Home>/bin/add-user batch (Windows) or shell(Linux) file, based on your OS. This utility requires Realm, Username and Password. Releam is the name of the realm used to secure the management interfaces, by default it is 'ManagementRealm' so you can just press enter. Also enter Username and Password to complete the user creation. Now you can login using the created Username and Password, by clicking the Administration Console link from JBoss home page.


    Setup Datasource
    To setup MySql datasource we have to add MySql driver as a module and create the driver & datasource. Let us get into detail on how to do this. Download MySql Connector Java, jar file and place it in <JBoss Home>/modules/com/mysql/main directory. Create a xml file in the main directory named, module.xml and copy paste the following code in it,


    <?xml version="1.0" encoding="UTF-8"?>

    <module xmlns="urn:jboss:module:1.0" name="com.mysql">
        <resources>
            <resource-root path="mysql-connector-java-5.1.18.jar"/>
        </resources>
        <dependencies>
            <module name="javax.api"/>
        </dependencies>
    </module>


    Open <JBoss Home>/standalone/configuration/standalone.xml file to add the MySql driver and create datasource. Find the datasource subsystem(
    <subsystem xmlns="urn:jboss:domain:datasources:1.0">) node in the xml file, and add the following code under drivers node.


    <driver name="mysql" module="com.mysql"/>


    To create datasource, add a new datasource node under datasources node with your MySql database configurations in 
    datasource subsystem. The following is a sample one.


    <datasource jta="true" jndi-name="java:/name-of-the-data-source" pool-name="name-of-the-pool" enabled="true" use-java-context="true" use-ccm="true">

             <connection-url>jdbc:mysql://localhost:3306/db-name</connection-url>
             <driver>mysql</driver>
             <security>
                 <user-name>root</user-name>
                 <password>root</password>
             </security>
             <statement>
                  <prepared-statement-cache-size>100</prepared-statement-cache-size>
                  <share-prepared-statements>true</share-prepared-statements>
             </statement>
    </datasource> 


    Once you are done with the above, restart the server, login to admin console, and click Datasources to view the created datasource. You can use this datasource in your J2EE application to connect to MySql database. 


    Monday, November 26, 2012

    BizTalk 2010: Why WCF Custom adapter is better than WCF-NetTcp, WCF-NetMSMQ ?

    Why WCF custom (In process or isolated) adapter is better than the other WCF adapters. When I discussed with a BizTalk team working for leading apparel client, they have used the custom adapter extensively and they haven’t used any other WCF adapters. I got some answer like
    “For example one of the requirements is to fetch a column from a table which is not a value but a XML message instead. In this case using WCF-custom developer can type poll to have better control on the table column that are fetched.”
     Yes the above statement is true. But it has more reason, after some exploration and I found the following list of usage
    • Implement and exploit extensibility points.
    • Have full access to properties exposed by bindings/behaviors.
    • Enable the use of the bamInterceptor endpoint behavior.
    • Export/Import the binding configuration.
    • Disable a receive location on failure.
    • Run an http-based Receivel Location within an in-process host.
    • Use bindings (e.g. wsDualHttpBinding) for which a WCF Adapter does not exist.
    Not sure, Why we need other WCF adapters like WCF-NetTcp, WCF-NetMSMQ etc. Since WCF-Custom Adapter (Inprocess & Isolated) can do the job?
    Only one use, I can think of , we can quickly configure other WCF adapters than the custom adapters and we don’t require to worry about any other behavior of the service. please comment if you know more reasons

    Exposing BizTalk Service metadata using NetTCP in IIS

    Usually the BizTalk WCF Service Publishing Wizard can expose the metadata using on HTTP Transport. Is it possible to expose in other transport mechanism? The question came to my mind, when I got an opportunity to solve a problem for one of the BizTalk Team facing for quite few days.
     
    The requirement is to publish the BizTalk WCF Service metadata in IIS i.e. the actual Service should be hosted in the BizTalk and the Metadata (Address, Binding, and Contract) should be hosted in IIS. The Critical point is both have to be in the same TCP Transport protocol.
     
    First, the below blog will give you step by step approach to publish the schema as service from the BizTalk application using “BizTalk WCF Service Publishing Wizard”
     
    But now the problem is service and metadata endpoint are in different transport
    Metadata endpoint: http://:/> (This service will be hosted by the IIS)
    Service endpoint : net.tcp://:/ (This service will be hosted by the BizTalk)
    After a day of analyzing various factor, I arrived the following steps to resolve the issue.
     
    Step 01: Configure the receive location as mentioned in the blog
    Step 02: Publish the metadata as usual BizTalk WCF Service Publishing Wizard
    Step 03: In IIS (This is the changes what we have to do)
    01.   Right click on the application -> Manage Application -> Advance Settings. Set the Enabled Protocol as “http,net.tcp” (Update by adding the net.tcp)
    02.   Web.Config changes.
    a.   Add the below configuration in the <system.serviceModel>. This will work only in .Net 4.0. Previous version does not have the capability to hold multiple binding
       <serviceHostingEnvironment >
            <baseAddressPrefixFilters>
                  <addprefix="net.tcp://localhost:808"/> (check the port in the binding of the website. The port has to be same)
               </baseAddressPrefixFilters>
        </serviceHostingEnvironment>
    b.      Add the new metadata endpoint as below
      <endpointname="mexTcpBinding"address="net.tcp://:/WcfServiceOneWay/Service1.svc"binding="mexTcpBinding"bindingConfiguration=""contract="IMetadataExchange" />
     
    Address :  Provide the full path of the metadata service URI.alternative you can set the base address in the config
     
    Now both the service and metadata endpoint are on the same transport
    Service endpoint:  net.tcp:// :/(Hosted by BizTalk)
    Metadata endpoint: net.tcp:// :/(Hosted by IIS)

    BizTalk 2013 Beta is here ... BizTalk is not dead

    Finally Microsoft have not killed the product and with strong note release the Microsoft BizTalk Server 2013 on 05-11-2012. Its an major release from Microsoft.

    The question is Whether the customers are going upgrade to this 2013, Since most of the enhancement is around the cloud

    Some of the key features are

    • Integration with Cloud Services – BizTalk Server 2013 Beta includes new out-of-the box adapters to send and receive messages from Windows Azure Service Bus. It also provides capabilities to transfer messages using different relay endpoints hosted on Azure.
    • RESTful services – BizTalk Server 2013 Beta provides adapters to invoke REST endpoints as well as expose BizTalk Server artifacts as a RESTful service.
    • Enhanced SharePoint adapter – Integrating with SharePoint using BizTalk Server 2013 Beta is now as simple as integrating with a file share. We have removed the need for dependency on SharePoint farms, while still providing backward compatibility.
    • SFTP adapter – BizTalk Server 2013 Beta enables sending and receiving messages from an SFTP server.
    • ESB Toolkit integration – With BizTalk Server 2013 Beta, ESB Toolkit is now fully integrated with BizTalk Server. Also, the ESB Toolkit configuration experience is vastly simplified to enable a quick setup.
    • Dependency tracking - The dependencies between artifacts can now be viewed and navigated in Admin console.
    • Improvements in dynamic send ports – BizTalk Server 2013 Beta provides the ability to set host handler per adapter, instead of always using the default send handler of the adapters


    Note : The above information is taken from the download page (www.microsoft.com/en-us/download/details.aspx)

    Tuesday, March 30, 2010

    Structuring the network services - A simple start

    As a network administrator, we keep our network growing and up all the time. But, some decisions which we have taken early, becomes a mess and creates many issues now. Yes the one of the issues well known for most of the administrators are the IP assigning.

    One of the network started with 4 computers, later became 2 servers and 10 stations, later increased and became more than 50. The computers were not fixed in same place, they started moving between departments, a new one started to get added every week, while new laptop users jumped on and off. 3rd party providers came to office and started working for some time and they were, on and off.

    The static IPs were split into zones and assigned but later the tracks were not right.. The PC entry log(at the gates) said we have more than 200 visitors every 3 months. Where our sub-net supports only 255 computer!!!!!!

    Yes the answer is simple, we need a DHCP.... but we also needed proper network structure.
    We need to know the network usage properly. We have wireless users and wired network users.
    All wireless users are laptop users, while few laptops connect through the wired network.

    The first level of separation is wired users and wireless users. Our internet gateway server has 2 Network cards which connects to internet and wired network, while the wired and network and wireless are mixed through the hubs.

    Now a new NIC card is added in the gateway server and that is used to connect to the wireless hub. A DHCP is used to assign range of IPs for wired network (192.168.1.51 - 150). While the gateway server for wireless network is the same gateway server, but it uses different network address range in 192.168.2.x, A DHCP for this zone is enabled and the IP is leased from 192.168.2.51 to 192.168.2.100.

    Now the network has few servers where they belong to wired networks... their IPs are added to static range from 192.168.1.2 to 192.168.1.50.

    The gateway server now has a firewall / routing rule. Only few mac address of the wireless network are allowed to connect the wired network while the rest can only access internet.
    While the wired network can access all the wireless network.

    The new installed PCs now work with DHCP never need to care about the IP when new users come in. Security to a level is in place..... but not 100% will discuss more about this in upcoming posts.

    Friday, February 19, 2010

    Basics of Networking - Part 4 (Debugging Basics)

    The past posts on the blog were on the basics of networking....
    Now we are about to see how can we debug is something is wrong in the setup.

    The following posts will help to debug faster.
    1. Basics of Networking - Part 1 - Assigning IPs
    2. Basics of Networking - Part 2 - Connecting Internet
    3. Basics of Networking - Part 3 - Internet through Proxy
    The default way to go through the debugging will be the following way.
    This approach starts to analyze the problem from the PC where the problem is found.
    1. ping 127.0.0.1
      If fails, check do the network services are started.
    2. ping assigned IP.
      If fails, check the network cable is properly plugged-in
    3. ping gateway
      If fails, check the gateway is on and the IPs are in same subnet.
    4. ping DNS / Name servers. (Only if routed / NAT is available)
      If fails ping the same from gateway.
    5. ping the gateway of the gateway from the gateway computer.
      If fails, check do you have the broadband signals / link is up.
    6. All works but still can't connect?
      try tracepath / traceroute with a google.com or yahoo.com
      Find at which level it fails.....
    Most probably the debugging the issues are based on what problems we have...
    Remember a blind issue of internet not working is OK to hear from others... but not when we are working in detail.
    So here are some FAQs....

    1. Could not ping Gateway but my network wires are properly plugged.
    2. Gateway pings but could not resolve host names.
    3. I use a proxy. My http connection works but not https and ftp.
    4. SSH connections are not working after introduction of proxy.
    5. I use proxy. DNS name resolving works in the browser but fails in the terminal.
    6. Internet works through browser, but can't ping any IPs / Hosts in the internet.
    1. Could not ping Gateway but my network wires are properly plugged.
    This may be due to improper IP assigning. We need to make sure that the IP of the PC and the gateway are in same network. (i.e are they in same subnet...). Theoretically they should be ping able to fix this issue. (Please refer the post assigning IPs)

    2. Gateway pings but could not resolve host names.
    This is due to improper DNS configuration. Is it possible to ping the DNS servers? If yes we need to be sure, they are really DNS servers ;-). If not ping able, we need to know do the DNS servers IPs are in our range of IPs (Within our subnet) or not. If the IP is within our subnet we may need to verify the DNS server configuration to make it work right. If the IP is out of our network. We may need to ping the DNS server from the gateway PC, i.e sometimes the gateway of the gateway might have network issues not letting us to connect to Internet....

    3. I use a proxy. My http connection works but not https and ftp.
    The proxy server has different way to support different protocols. Some proxy servers use same port for all kinds of requests. If so the client setting should have same proxy setting for different kind of services. Some proxy servers block may not serve certain protocols, better check the proxy configuration to very the supported protocols.

    4. SSH connections are not working after introduction of proxy.
    If the client is PuTTy we can configure the proxy settings in the PuTTy. If the client is a linux terminal and we have the problem only for SSH. we need to use http proxy for SSH, tools like corkscrew with ProxyCommand in linux will help. The other workaround is to support NAT in the gateway so both proxy and NAT.

    5. I use proxy. DNS name resolving works in the browser but fails in the terminal.
    When the browser works with proxy, the name resolving happens in the proxy server while when we try in terminal we have the name resolving based on the DNS server settings in the IP / Network configuration, May be NAT is disabled in the network so we cannot resolve the DNS directly from the current PC.

    6. Internet works through browser, but can't ping any IPs / Hosts in the internet.
    This is similar to the previous question, enabling NAT will support pinging from any PC in network, The internet works in browser because of the Proxy settings.

    The above are not the complete list of problems that might come... they will change according to the network and the usage of network services. The NAT / Proxy has its own advantages and disadvantages where the issues are because of them... Planning the network again falls on what kind of services we use and the debugging procedure remains the same, how big the network is.

    Will keep you posted on some new network services and setting up a right infrastructure.

    Thursday, February 04, 2010

    Basics of Networking - Part 3 (Internet through Proxy)

    Hurray.... My network is UP........
    Hurray.... My Router shares the internet connection.......

    Do I need a Proxy?
    A good point that makes us to think. Do we need a proxy? When the router shares the internet. Why do we need a proxy?

    If the ADSL modem is our router. We need to think about proxy based on our network size. Sharing about hard learning, we felt the router was extremely good to share internet connection acting as a gateway. But when the network size started to grow we faced frequent network connection drops.... Why?

    The ADSL Router was not good enough to handle the too many requests from different machines. May be this is not the case for all the routers but our router did this to us (The router is a least version provided by the ISP, not designed for high traffic).

    Whats up next?
    Let the internet connection be bridged. Let the PC take up the load....
    Let the PC take up the Proxy......


    Yes. We are to the topic now.......... Let us know about proxies to get internet shared in the network.

    What is a Proxy?
    To keep it short. It is an application that acts a layer in between our application (browser) and the web server.

    Let us understand the network now.
    All the PCs are in same sub-net
    PC - A - 192.168.1.1
    Laptop - 192.168.1.2
    PC - C - 192.168.1.3

    Gateway for all should be 192.168.1.1 (PC A, should not have a gateway)

    The PC A is running on Windows.........
    It has two NIC (Network Interface Card). The first one connects to the ADSL router for Internet connection using the bridging option. The second one now connects to the local network with the IP 192.168.1.1

    To make the internet connection simple, use AnalogX Proxy.
    Download and install it. When we run it... We see it runs on a Port 6588.

    Yes it listens on 6588 Port on 192.168.1.1
    We need to say this in our browsers and other internet accessing application like GTalk, Skype, Yahoo Chat and more

    Click here to know on how to configure your browser.

    Do we need to go only with AnalogX?
    No not at all.....
    We have too many proxy software with very advanced operations.

    Are you having a SOHO (Small Office / Home Office) Network?
    Wanted more than a normal proxy?
    Still wanted the NAT(Network Address Translation) Feature of the ADSL router with a PC as a gateway?
    Wanted more features of Proxy, Firewall and Advanced gateway?

    The answer would be, try IPCop-Linux........

    When the network grows..... Want too many things to do for internet?
    Keep watching..... We will see, how to load balance internet connectivity with multiple Internet connections and multiple proxy servers. There are more to come, for now will go with basics in the network.

    Saturday, January 30, 2010

    Basics of Networking - Part 2 (Connecting Internet)

    For a long time network was an unknown thing, while I was using the network services without knowing how it works....

    Have I understood it now? Well the answer is "partially". Yes still it is an unknown mystery for me.

    But how could I write about something I don't know?
    I would say. I write something that I have learned hard.... spent months and years and found a simple solution may I was in wrong direction, I had no right person behind me to teach. All you see in this blog is not learned from a course... but learned when needed, some through other sources, some through practical experience and what ever worked well after the learning is written but they are not always best.... ;-) You find a better way later or you may know it. If so please correct me when they are wrong.

    Going to the topic... Let us start inter-networking (I mean, connect to internet).

    What are we going to and not going to discuss in this connecting to internet

    We are about to see how can we connect the entire network to internet and we are not going to discuss about single PC internet connection as that will be mostly explained by the ISP.

    We assume that we are using a broadband connection to share among our network.

    Always an broadband internet connection has to go through a router, also called as ADSL modems. These modems take care of two things
    1. Digital signal transmission through the telephone lines.
    2. Acts as a router and becomes our gateway.
    The second point looks odd and we are not clear on what it is going to do. Let us make it clear.

    Router is usually a device that is usually used to forward information between two networks, basically to connect networks of different subnet.

    To access internet we need an IP address that is matching to the network of the provider (ISP). So the Router gets the IP from the ISP and on the other end it also has a local IP of our network.

    Do this means it has two IPs?
    Yes, it has two IPs, one end for the internet and other for our local network.
    It acts as the gateway for the network. (Read - Basics of networking).
    So all the internet requests navigate through this gateway and this gateway contacts the ISP to get our requests answered.

    What else it can do?
    This router also connects in an other mode called bridging. The bridging is a simple way of only acting as a modem and it translates the computer signals through the ISDN wire while the IP of the provider is directly assigned to the computer to which the router is connected. The bridging is possible if only one computer connects to the internet through the router.

    The IP will be assigned dynamically or statically. They become active on boot or using PPPoE (Point to Point Protocol over Ethernet) dial-up.

    How do we share the internet from the router?
    IP Details
    1. Modem/Router - 192.168.1.1
    2. PC A - 192.168.1.2
    3. Laptop B - 192.168.1.3
    4. PC C - 192.168.1.4
    All the above has same subnet and same gateway 192.168.1.1 which means the router is the gateway for all IPs.

    All the PC needs DNS Server IP to identify the websites out of its network. The DNS IPs will be provided by the ISP or we can use Google's Public DNS.

    Thus the ADSL router makes internet available for all the computers in the network.

    While we will discuss on sharing the internet using a proxy in upcoming posts.
    Basics of networking - Part 1 (Assiging IPs)

    Let us start networking.... ;-) Not social networking

    Since the start of the blog, we have been to the topic and this time too we are to the topic.

    We are about to connect more than two computers to form a network. This involves various process to make it happen. As this blog is more about configuration management, we expect the readers to know more than basics in the computers. To start with they should know to change IP addresses in the OS.

    I assume we are not about to discuss about hardware issues here and the following are correct.

    1. The network cables are properly crimped and they work.

    2. The network switch or hub used to connect is working good.

    3. The NIC (Network Interface Card) is installed properly and is working good.

    4. The OS has necessary drivers and supports TCP / IP (IPv4)

    5. The user has enough rights to change and play with Network Setting in his environment

    When most of us know “what is an IP Address” and “how it is useful”. We forget to understand how it really connects to more computers than what we have near us.

    Hmmmmmmmmmm.................. What are we going to learn about IP Address now?

    Though most of us know what an IP Address is, am adding some simple explanations to go further.

    IP Address is like a name to a computer, Which we use to identify the computer, but these are not names with alphabets but with numbers. They are 4 numbers each number separated by a “.” . Each number has a range from 0 – 255 (8 bit). Eg: 192.168.1.1

    To make a machine work in network it needs an IP Address to identify in the crowd and this should be unique within the network.


    As we decided to connect more than two computers in a network. We are going with the following example.

    The IP Address are differentiated into classes A,B, C. Since we are more into action, I would recommend to read about it more detailed. We are having a sample IP Address 192.168.1.1, Let us use this for our network. Before using we need to ensure that they are connected to each other as in the above diagram.

    1. A – 192.168.1.1

    2. B – 192.168.1.2

    3. C – 192.168.1.3

    OK. Is this IP address enough to communicate? No we need to say a subnet to make this work.

    Subnet............ What is it?

    Subnet is a notatation or a number used to say how many computers do this IP Address can connect and what is the starting IP of this range and ending IP of this range. The subnets are also similar to IP but they have few calculations. I would recommend to try the application in http://www.subnet-calculator.com/ where it explains the change in subnets and the change in ranges for that.

    So we choose subnet 255.255.255.248 as it has range of 192.168.1.1 – 192.168.1.6 (6 computers in the network)


    What happens when an IP is out of this range? How can we access it?
    Here comes a gateway for the network. Which always has the door(gate) to access the other network IP. The gate way will be always the first IP in the subnet range, this is not a rule but this is a best practice to identify the gateway in any network. 192.168.1.1 is the gateway here. Setting this up in all the machines(A, B and C) should make the network accessible within the A, B and C.

    So, we should be able to ping 192.168.1.2 from Machine A and C and the rest of IPs from other machines(A,B and C). This confirms the network setup.


    Wednesday, December 16, 2009

    EDI - Schema Validation error while developing

    Today I was trying few edi schema, On trying to validate in VS 2005 for the BizTalk Project, I found a error
    ../X12_BatchSchema.xsd: error BEC2004: Object reference not set to an instance of an object.
    ..\X12_BatchSchema.xsd: error BEC2004: Validate Schema failed for file: .
    ..\X12_BatchSchema.xsd: error BEC2004: Validate Instance failed for schema X12_BatchSchema.xsd, file: .
    Component invocation succeeded
    .


    I tried to debug this issue, I found after lots of experiment. I removed my property schema, which I used for the schema. The error dissapeared and Validation succeeded. I am not sure why the error occured, Looks like the validation component not able to recognise the proper schema if there is property schema in the project.

    Tip
    So during development do your property promotion after validating you modified edi schema